 |
 |
 |
Measurement Selection
The Measurement Selection screen is used to select the server performance parameters or counters you want to check with the applicable monitor.
Note: This screen is applicable to the Windows Resources Monitor and WebSphere MQ Status Monitor.
The screen is divided into two main sections.
-
Available Measurements: A browse window which
displays available objects, queue instances, and channel instances, and
counters to choose from. You must first select either Queue or
Objects to work with, in the Objects: drop down box.
Once an object is selected, a connection to the applicable server will be
made, using the server information provided in the previous page. A
list of available queues, channels, or counters will be displayed, both system
and user instances, depending on the object type selected. Click
the Add button, the instances and
counters you select using the check boxes will be combined into
individual monitoring counters, and listed in the Selected
Measurements window, below.
- Selected Measurements: Lists the counters you have selected to be monitored from pressing the Add button. The "X" box preceding each counter allows you to delete the counter.
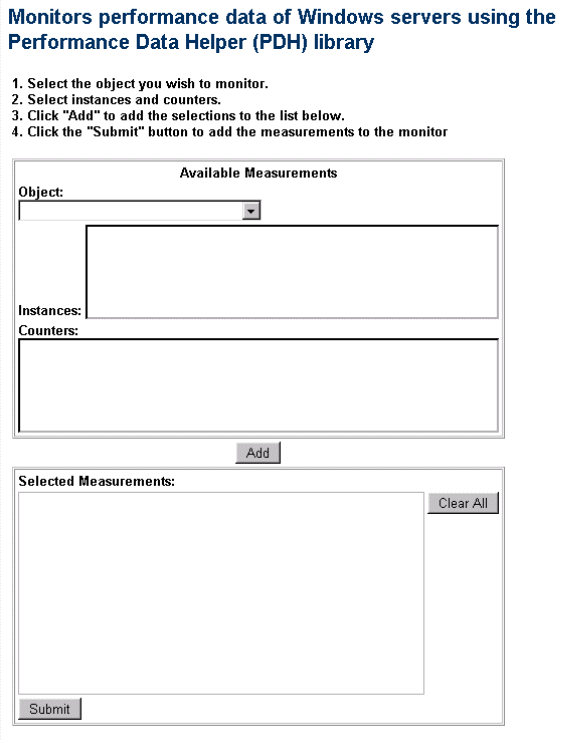
Depending on the browser you are using, a tool-tip text is displayed on mouse over. The following is an example of the measurement selection screen for the Windows Resources Monitor.

Use the following steps to selection or edit measurements and counters.
To select measurements:
- On the applicable Add Monitor page, click the Select Measurements link.
The Measurement Selection screen is displayed.
The performance measurement selection screen is divided in two sections. You use the upper section to browse available Objects, Instances, and Counters for performance data available on the remote machine. The lower section records and displays the measurements you select for this monitor.
- Use the Object drop-down list to select an Object class to monitor.
SiteScope will query the remote machine and populate the Instances and
Counters
according to the Object selected.
Note: an Object may have Instances and Counters or only Counters but no Instances.
- Select the Counters or Instances and applicable Counters you want to monitor by clicking the check box to the left of the Instances and Counters displayed. Use the Select All or Clear All buttons to the right of the screen to modify your selection.
- Click the Add button below the Available Measurements box to add your selections to the Selected Measurements section.
- Repeat the steps above to select additional Objects and Counters. It is recommended that no more than ten measurements be made per monitor instance.
- Click the Submit button at the bottom of the Selected Measurements section to save your selections and return to the Add Monitor page.
To edit measurements:
- Click the Edit link for the monitor you want to edit. The Edit Monitor page is displayed
- Click the Select Measurements link. The performance measurement selection screen is displayed.
- Use the Object drop-down list to select new Object class to monitor or select new Counters or Instances you want to monitor by clicking the check box to the left of the Instances and Counters displayed. Use the Clear All buttons to the right of the screen to modify your selection.
- Click the Add button below the Available Measurements box to add your new selections to the Selected Measurements section.
- You can remove measurements from the Selected Measurements section by clicking on the selection box to the left of the measurement name.
- Click the Submit button at the bottom of the Selected Measurements section to update your selections and return to the Add Monitor page.
The performance parameters or counters available for the monitor will vary depending on the monitor type, operating system options, and applications are running on the remote server. See the applicable monitor documentation for measurements avialable with that monitor type.
 |
 |
 |
